|
| Grits and Edge Durability |
|
| Finest abrasives. | ||
| Microbevels front and back. | ||
| Use a jig. | ||
| Copyright (c) 2002-15, Brent Beach |
If you got here without going through my main sharpening page, then you should visit it to find out about the Microscope I use to take these pictures, the sharpening setup I use, and other details of plane blade testing. If you wonder why the edge is blue in the pictures below, you should read my microscope page. You should also read my jig page to see how I sharpen these blades and how I am able to get these consistent microbevels.
The question covered in this page is: does the finest grit used affect edge durability?
Most people use a series of grits, from coarsest to finest, when preparing a plane blade edge. I wondered how fine a grit is needed. The question arose during a long series of plane iron tests. I was sharpening all the irons using a series of three grits - 15, 5, and 0.5 micron. I was taking microscope pictures of the edges at each stage of the sharpening and during use. The pictures of the edge after the 0.5 micron abrasive showed occasional deep scratches that I thought were the result of stray grits contaminating the 0.5 sheet. I tried a number of things to make sure the 0.5 micron abrasive would not get contaminated, but the scratches were still there. Eventually I discovered that I was putting those scratches on the edge when I rubbed the blade on my palm to remove the baby oil and prepare it for the microscope! Some of the scratches on the 0.5 micron bevel in the first picture probably arose in this way.
It seemed to me that if rubbing the iron against my palm was putting bigger scratches on the iron than the final abrasive, perhaps I was going too far. This series of tests compares performance of a single plane iron sharpened to three different final abrasive levels to see if there really is a difference.
Before the test |
|
|
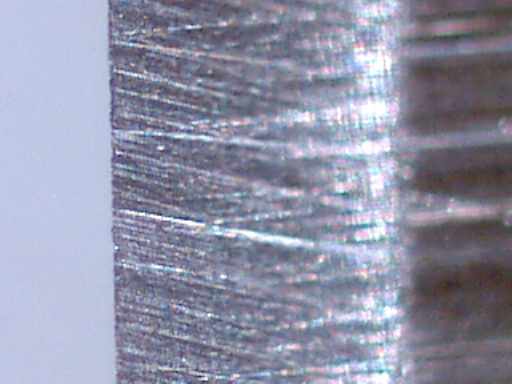
Here is the blade in worn condition before the test. There are 4 bevels visible. From left to right in the picture, they are:
|

|
First test - use only 15 micron abrasive |
|
|
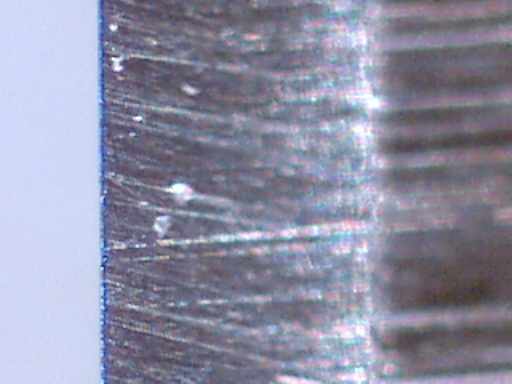
Here is the same iron sharpened with 15 micron paper. The edge bevel angle is 32 degrees (I will use 32 degrees as the edge bevel angle for all tests). The edge looks a little irregular, but the bevel is flat to the edge at 32 degrees. The 15 micron bevel is wider in this picture because in order to produce a full 15 micron bevel at 32 degrees I had to remove a bit of metal. This single microbevel is about 0.02" wide. |
|
|
Here is the iron after 50 passes. Each pass is along a 48" piece of douglas-fir. Again, the wear bevel shows up blue. This wear bevel is about 0.0002" wide. This seems very narrow, but it has a much larger surface area than the edge of the freshly sharpened blade. The effort to push the iron into the wood is much greater than with a sharp iron, but still manageable. |
|
|
Here is the iron after 100 passes. Subjectively the surface of the wood is not as smooth as I would like - it feels like there are a couple of small nicks in the edge but they are not in this part of the blade. The wear bevel is around 0.005" wide. |

|
Second test - use 15, 5 micron abrasives |
|
|
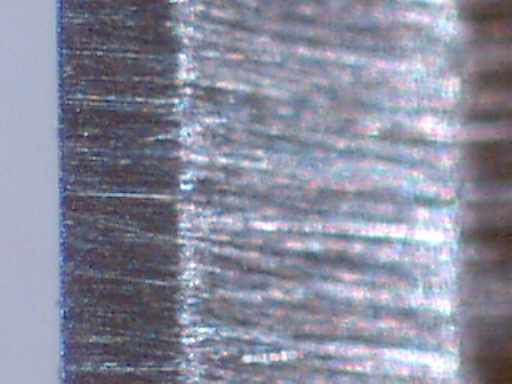
Here is the iron after reforming the bevel with 15 micron paper at 29 degrees. This bevel is about 0.03" wide. The edge looks a little irregular again. |

|
|
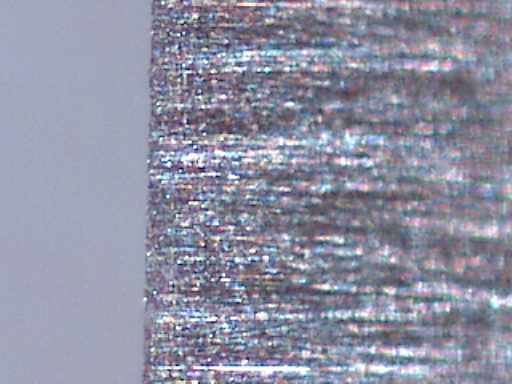
Then after 5 micron paper at 32 degrees. This bevel is about 0.01" wide. The edge looks pretty good. |

|
|
After 50 passes. Differences between this and the 15 micron edge at this stage are hard to assess. Subjectively, the surface feels smoother. The wear bevel, showing blue, is again about 0.0005" wide. |
|
|
After 100 passes. The wear bevel is about the same width as in the previous test and has a little nick. Subjectively, the surface feels smoother than the previous test. Wear bevel again around 0.0006". |

|
Third test - use 15, 5, 0.5 micron abrasives |
|
|
Starting again, with 15 micron at 29 degrees. This bevel goes off the right edge of the picture. |
|
|
Then 5 micron at 31 degrees. This bevel is about 0.01" wide. |

|
|
Then 0.5 micron at 32 degrees (about 0.003" wide). The last microbevel shows very few scratches (they are there, just too thin to show up using a visible light microscope). |

|
|
After 50 passes, the wear bevel is there but faint. (This picture was taken at night, so the wear bevel does not show up as blue. You can see it as a little different texture at the edge.) The plane performance was much different than with the previous two sharpenings. Even this small difference in apparent sharpness makes the plane much easier to use, with finer shavings shooting out of the mouth. This ease of use, very fine shavings with little effort, means that you use less downward pressure. Less downward pressure results in less wear on the bottom face of the blade. It is not a difference in the quality of the edge itself, but how the user reacts to that difference that changes the durability of the edge. |

|
|
After 100 passes, edge still looks good. Bright blue wear bevel because I took this picture in the morning when the room is the brightest with sunlight. The bevel is a little better than in the other tests - around 0.004" wide. |

|
A final composite image of the three blades after use. The blade on the left was sharpened with 15 micron at 32 degrees. The blade in the middle, with 5 micron at 32 degrees. The blade on the right, with 0.5 micron at 32 degrees.

Long run benefits appear small - the edge after 100 passes shows about the same wear bevel for all three grits.
Short term benefits not measured by this test were subjective. Effort decreased as grits got finer, surface quality improved as well.
For some, a visual check works pretty well. Holding a dull iron to the light I can see a bright line along the edge -- you need a narrow light source, I cannot see the bright line just holding the blade up to a window. Others prefer the touch test -- they work the iron until they can feel the wire edge when they brush their finger tips gently across the back of the iron toward the edge and then off.
I prefer the visual check for the wear bevel, which is important in my system only at the first grit. I make sure that I remove the wear bevel using the 15 micron abrasive. On the second and third grits, my system ensures a good edge because it starts at the edge and works back. My visual check there is for the width of the microbevel at the edge.
Return to the Sharpening home page.