|
| Radiused irons |
|
| Finest abrasives. | ||
| Microbevels front and back. | ||
| Use a jig. | ||
| Copyright (c) 2002-15, Brent Beach |
If you are here to learn about cambering tools in general, not just scrub planes, then you should read Introduction to Cambering Edge Tools. If you are here to see how to shape a scrub plane iron, then continue.
The camber on the iron allows you to take shavings of a particular thickness without the edges of the plane digging into the work. This means that the camber is slightly more than the thickness of the shaving.
 If you have a 1 1/4" scrub plane (bevel down) and want to take a shaving that is 0.1" thick (a medium thick shaving), then you need to have a camber of 0.14" on the blade (the blade on the left). This page shows you how to do that.
If you have a 2" bevel up scrub plane and want to 0.1" thick shaving, you need a camber of 0.48" (the blade on the right).
The Introduction to Cambering Edge Tools includes a simple calculator that lets you compute camber from plane iron width, bedding angle and shaving thickness.
While the blade on the right looks like it will take a much bigger shaving, remember the blade is used at the bedding angle. The shaving taken by the blade on the left is 0.083 square inches in cross-section, that taken by the blade on the right 0.14 square inches in cross-section. The ratio between the two cross-sectional areas is only slightly different from the ratio of the two blade widths. Both planes remove about the same amount of wood, so require about the same effort.
 The other common highly cambered blades are used in molding planes. With a cambered blade and a flat sole you can pick your radius based on the thickness of shaving you want to take. When the plane has a rounded sole and you want to produce a rounded blade with exactly the same curvature, you use the set of the sole in the calculator. Measure the blade width and the plane width. Draw a line half the difference in from each side along the back of the plane. Draw a line where the lines meet the sole. Measure the distance from this line to the bottom of the sole. Use this number as the set in the camber calculator. You will also need to estimate the bedding angle of your plane. You may be able to do that by putting a flat ruler on the bed, through the mouth, then measuring the angle to the ruler.
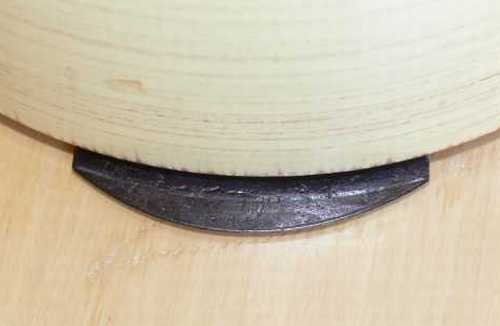
Mark the new shape on the back of the blade. I am putting a 3" radius on a blade with a much smaller radius for these pictures. This is not a scrub plane blade. It is a blade from a inexpensive third line manufacturer - Metal Products. An inexpensive blade sacrificed for this test.
The goal is to have a visible line that is reasonably thin, so when you grind to the line you have the shape you need. If the line is too wide or uneven, the resulting curve can be ragged.
One way to do that is to blacken the back, then use a pointed tool (a fork worked for me) to remove some of the black.
In this picture, you can see the 6" diameter bowl I used, the blackened blade, and the pale line that is the scratch. You don't need complex drawing tools. Just look around for anything round of the appropriate radius - plate, bowl, plastic container of some sort. You might begin by drawing a straight line across the back, then position your round template so it touches the line at the sides of the blade, then draw your arc.
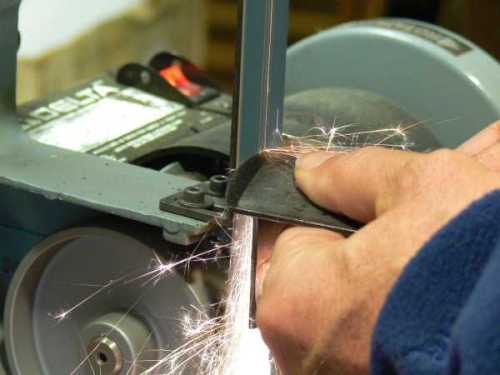
With the blade perpendicular to the abrasive belt (grinding wheel), grind to the scratched line.
This is a 40 grit belt that can remove metal pretty quickly. I don't force the blade, but do apply steady pressure, while constantly rotating the blade back and forth across the belt. The blade is always moving!
With a fresh belt, working the end of the blade (a narrow surface compared to a primary bevel), the grinding goes quickly with no heat build up. It does tend to eject bits of grit from the belt into the air though. You might want to use a face mask here to avoid breathing in the bits of grit and steel filings the belt sander blasts into the room.
The tool rest is vertical, the blade resting on the edge -- I can't actually set my tool rest to 90 degrees to the belt but I can set it at 180 degrees (parallel)!
This picture was taken when I was almost finished shaping the blade. The bright line is visible at the edge.
Return to the Nitty-Gritty page.
Return to the Sharpening home page.