|
| Grinding - sheet abrasives |
|
| Finest abrasives. | ||
| Microbevels front and back. | ||
| Use a jig. | ||
| Copyright (c) 2002-15, Brent Beach |
Grinding forms the primary bevel on the plane blade or chisel. Honing forms microbevels.
Many of the problems associated with high speed grinding are reduced or eliminated by low speed grinding. Hand grinding using sheet abrasives or bench stones eliminates the danger of over heating and, when done using a jig, produces a straight edge that is also square to the side of the blade (and a beautiful primary bevel).
The main goal of this test was not to investigate grinding. It was to investigate initial sharpness of plane blades made from a variety of tool steels. In order to bring all blades to the same initial state I decided to turn a burr on all blades during the primary bevel grinding step. This grinding protocol is different from my usual -- I normally stop short of the edge. As you will see, I should have stopped short of the edge on this test as well.
Coarse Silicon Carbide bench stones remain the best option for hand grinding primary bevels.
| M2 | Academy Saw Works |
| CPM 3V | Steve Elliott |
| D2 | Gramercy |
| S53 | Holtey |
| A2 | Lee Valley, Lie Nielsen |
| High Carbon Steel | Clifton, 2 Stanley 1910 vintage, Sargent 1900 vintage |
The D2 blade primary turned out to be not quite flat -- the last 3/8" near both sides was ground away a bit more than the rest of the primary. I did this (inadvertently) when I first got the blade. It came with a 27.5 degree primary, which I ground back to 25 degrees using my belt sander. My notes at the time say that I used up a belt grinding the two Gramercy D2 blades. It is interesting that this blade was also by far the most difficult to grind using the Norton 3X abrasive. Why it should be a bit less durable than the M2 blade, but be harder to sharpen, is a mystery to me.
 The Norton 3X abrasive advertising literature says:
| 3X HIGH PERFORMANCE NO-FIL ADALOX A259 Premium, P-graded aluminum oxide abrasive with fiber-reinforced backing. Specially coated to resist loading and tearing for 3X the life over conventional aluminum oxide products. First choice when performance counts on sanding tough finishes or looking for exceptional finish. High flexibility. |
Norton expects people to use this abrasive in wood finishing, not in metal grinding. The backing is quite thick and quite flexible and not water or oil resistant - they expect you to use this paper dry.
Norton does not sell a PSA version of this paper (none mentioned on their web site). This means you have to use a spray adhesive and glue this paper to glass. The paper backing is thicker and softer than most other abrasives I have seen, but could be glued to the glass without problem.
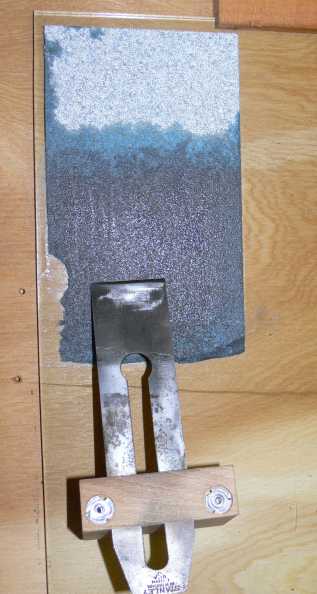
In this test I used a standard 2" tall wooden jig for all the blades. This is an after grinding picture of the last blade I tested - an 1916 vintage Stanley laminated blade.
I started using it dry, but felt that even though the paper is an open coat there was some build up of filings on the sheet that were slowing further metal removal. I added a generous squirt of baby oil and continued.
After 5 blades I cut off the lower 3" and continued using the sheet. You can see the lower area darkened by the baby oil and filings. The upper area is the original abrasive colour.
You can see as well that I have managed to slice off a bit of the abrasive. As the oil soaks into the paper, the paper softens. It is possible to dig a corner in and cut the abrasive - I did it when I skewed the blade to get angled scratches on the blade to provide contrast in photographs of the primary bevel.
The oiled paper gets soft over time. When I tried to lift the worn part off the glass it pulled apart. I also noticed that the irons have excessive side to side camber suggesting that the sides of the abrasive sheet are actually expanding as they soak up mineral oil. This is definitely not an abrasive to use wet.
Mark Wells, who put me on to this abrasive, uses it dry, removing the filings with a magnet and a plastic bag. On subsequent test with dry abrasive, I was able to use a soft brush to remove the filings. [Mark later checked his plane irons under a microscope and saw similar defects.]
 The Norton 3X is easily able to renew a primary bevel on all of these plane blades. I spent about 30 minutes doing 10 blades. The high carbon steel blades took less than a minute each. The remaining blades took a couple of minutes, except for the D2 blade which took about 5 minutes. I may repeat the test with the D2 blade on fresh dry paper to make sure that abrasive condition is not a factor.
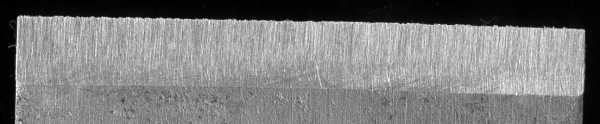
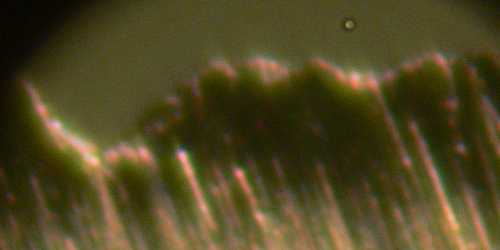
This scan is of the last blade - a "V" logo Stanley.
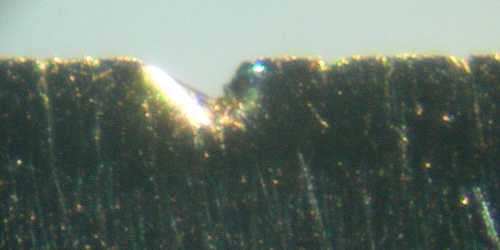
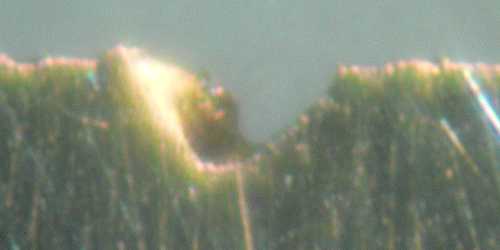
All those who grind until they turn a burr before honing probably don't want to look at these pictures. In all cases the picture shows the worst bit of the edge.
I normally do not grind enough to produce a burr - I only grind almost to the existing edge. As a result, this carbide popping and edge defect problem was a surprise to me - in thousands of images of honed blades over the years, including all of the blades used in this test, this is the first time I have had popout in a ground/honed blade.
| CPM 3V |

|
| Clifton Hand-forged |
|
| Holtey S53 |

|
| Gramercy D2 |

|
| Lie-Nielsen A2 |

|
| Lee Valley A2 |
|
| Sargent 1910 era |
|
| Stanley 1910 era (T logo) |

|
| Academy Saw Works 2002 |

|
| Stanley 1914 era (V logo) |

|
All three would remove metal even on the hardest blades, but the rate was too slow to even continue the testing.
I intended to turn burrs on a couple of the harder blades with 100 grit and look at the resulting edges, but with grinding times in excess of 5 minutes, there were clearly not realistic alternatives to other grinding methods (coarse Silicon Carbide stone, for example). I terminated the test at that point.
So, we have big carbides in some of these blades. Other methods of sharpening have smoothed the carbides in place, rather than popping them out. The factors that might induce popping:
| Hand versus machine grinding | I did press fairly hard while grinding, harder I expect than most people would press a blade into a wheel or belt. Lighter grinding pressure might produce a different result. On the other hand, with a powered grinder the abrasive bits hit the edge at very high speed, certainly imparting as much force as I apply by hand. |
| Norton 3X |
Abrasive grit uniformity may be a problem with Norton 3X.
The 3M Microfinishing abrasives are said to have a high degree of grit uniformity. In all my photomicrographs of honed surfaces, I rarely see non-uniform scratches. I have been unable to find the uniformity specification the the 3X line. |
| Open coat style abrasive |
This is a very open abrasive - looking at the surface, the abrasive grits are widely dispersed when compared to the 3M microfinishing abrasives. I think this is part of why this abrasive is so fast. If only 10% of the surface has grit, then the effective force per grit particle is 10 times as large.
This increased force per grit particle may be isolating too much force on the carbides, causing them to pop. |
| 60 Grit |
60 grit is a rather blunt instrument. With a finer grit, there would probably be more grit particles per unit area, so more grit particles under the blade, reducing the force per piece of grit.
Note as well that it is harder to grind almost to the edge without actually hitting the edge with larger grits. So, it may be very hard to not hit the edge with 60 grit. |
| Abrasive Uniformity | If there are some large grits, they may exert even more force on the blade. If there are uniformity problems with Norton Abrasives, this may be part of the problem. Larger grit numbers may have relatively smaller exceptional grits, reducing popout. |
| The Abrasive |
Is it possible that the Aluminum Oxide is not sharp enough to smooth the carbides, but is hard enough to grab them and pop them out? What type of test would prove or disprove this possibility?
Silicon Carbide is sharper but fractures more easily - you use it up more. It could be that this fracturing not only renews the sharpness, but occurs at a force below that required to fracture the blade edge! |
| The included angle |
The angle at the edge when grinding is 25 degrees, when honing is between 29 and 34 degrees depending on which microbevel is being honed.
Perhaps the additional metal is enough to make the difference between a carbide popping out and staying in. |
The bottom line though is that grinding enough to produce a burr using Norton 3X 60 grit may have negative consequences for edge quality. I tried other grits -- 100, 150, 220 -- but none had the speed required to make this a reasonable option.
Grinding up to the edge will certainly eliminate this carbide popping problem, but the large grit size of the 60 grit means stopping well back of the edge. Other grinding setups (coarse Silicon Carbide stone, belt sander) allow closer approach to the edge without actually nicking the edge.
If you must grind until you get a burr (and it may be a good idea in certain situations), then a combination of lighter pressure, finer grit, perhaps even a different abrasive (either type of abrasive or not using an open coat abrasive), may eliminate pop outs.
I would be interested in any ideas connecting the carbide pop outs and the grinding method.
I subsequently reground the primaries on all of these irons (removing the honed 29 degree microbevel, turning a very small burr) using a coarse Silicon Carbide bench stone. Only one of the blades showed any popout. Silicon Carbide bench stones are the best answer I have found to date for hand grinding primary bevels.