|
| Bench Stones for Primary Bevels |
|
| Finest abrasives. | ||
| Microbevels front and back. | ||
| Use a jig. | ||
| Copyright (c) 2002-15, Brent Beach |

Introduction
You are deep in my sharpening pages - pages describing how to sharpen plane irons and chisels. This page covers grinding the primary bevel using a Silicon Carbide bench stone. Other pages cover testing plane blades, my sharpening setup, honing. To start from the beginning, go to my top index page.The picture on the right shows a coarse silicon carbide stone in a shop made stone vice. The stone vice page shows several versions, including a new version made by George Daiber.
Contents
- Background - my path to bench stones for grinding.
- The Video - you can watch me grind a primary bevel using a bench stone on YouTube.
- Which bench stone - few stones are suitable for grinding a primary bevel.
- Jig or no Jig?
-
The Setup - how to use a bench stone for grinding the primary.
- Wet or Dry?
- Short cut - even faster grinding by adding yet another bevel.
- The Pictures - fabulous bevels in no time. Double click on a picture for a much bigger image.
- Stone Wear - the SiC stone lasts like a champ, the water stone was gone after a single grind.
- Video demo - discussion of the blade used in the grinding video and the use of a bench stone to remove pitting on the back of the blade.
- What am I doing wrong? - everything looks right, but the edge is not square to the side of the blade.
- Other bench stone tests.
Background
Early on in my sharpening education, I was grinding the primary with a bench grinder (various types of wheels) and honing with bench stones - both oil stones and water stones. I was not getting usable results.I read Leonard Lee's sharpening book and the Lee Valley catalogues. From them I decided to try a 1" belt sander to replace the grinder. The tool rest on the 1" Delta belt sander cannot be used when grinding at the angles required for plane blades and chisels, so I bent a bit of angle iron to make a new tool rest for the belt sander. Things went well and I put away the grinder. See here for a discussion of grinding using a 1" belt sander (and a short discussion of grinding wheels).
With the grinding problem solved -- I could now quickly produce good primary bevels at any required angle -- I turned to honing. Again, Leonard Lee and Lee Valley tools provided the inspiration and the abrasives - 3M microfinishing abrasives. The honing jig was my own idea.
Over the years I came to recognize the limitations of powered grinding and developed a jig for holding bench stones along with a new jig for holding plane blades or chisels and switched to hand powered grinding.
The Problem
I gave a couple of sharpening workshops which used the honing station and jigs discussed in these pages. Each student got the full setup as part of the workshop.Each student brought along tools to sharpen - a plane blade and a chisel. The goal was to hone great edges on those tools.
Unfortunately, almost all the plane blades and chisels had bad primary bevels. The students came to a honing workshop, but they could not grind yet. Until you have a good primary bevel, you cannot hone the blade. I ended up grinding primary bevels on most of the older blades and even some of the new blades before we even began to discuss honing.
This page shows you how to get precise primary bevels on your tools. Once you have a great primary bevel, you can head back to the honing pages and hone a great edge on them.
Grinding options
For most home woodworkers there are three grinding options: powered grinding wheels, belt sanders, bench stones. I discuss belt sanders and grinding wheels here. I have come to the conclusion that hand grinding gives better results. The main benefits are things that do not happen with hand grinding:- no chance of overheating,
- no microscopic metal deformation,
- not abrasive dust or metal filings in the air.
Aside from eliminating some negatives, there are positives:
- better angle control,
- a flatter bevel,
- a stone is much easier to use than either a wheel or belt,
- it costs a lot less.
The Upside
The cost difference is amazing. You can buy the one bench stone you need - it will last many hundreds of plane iron grindings, a lifetime for most woodworkers - for $15. You make the stone vice - some wood and about $15 in threaded rod, wing nuts, washers, and glass. You make the grinding jig - a few screws and some scrap wood. A lifetime system for less than the cost of one of the newer grinding wheels.The Downside
Grinding on a bench stone is more difficult than grinding using a belt sander. I only started using this setup after years of honing using jigs - I was very comfortable with the jigs. Fixing a bad bevel on an older chisel or grinding a wide plane iron made of a harder steel (D2, M2) can take quite a while.Even though I use the bench stone for re-grinding the primary on tools with good primaries (tools I have ground before), I still use my belt sander for problem tools. So, if you decide to go with a bench stone you will probably still want to have a belt sander.
Video
I made a bad video of a grinding session. I bought (March 2007) a Stanley #30 type 6 -- the planes Stanley sold from 1874 to 1884. The plane's knob has a bead at the base, so is probably earlier in the period for this type of plane. The iron was nearly full length - 1.5" below the slot (not the 2" I mention in the video) - and is correct for a plane of this vintage. The sole was covered with paint and was slightly worn in the middle near the mouth -- I suspect the plane was unused until recently when it was used to plane a door. All the screws are without corrosion and there is just one check in the sole. I expect to be able to rehab this plane.The blade was rusty, superficial mostly, and the primary bevel was at about 30 degrees. I used this blade in a demonstration of grinding a primary bevel using a bench stone. Unfortunately the camera was aimed a little low and the views of the primary are not very good. I have added a discussion of the sharpening of that blade, during which an interesting problem arose and was solved.
Which Type of Bench Stone
Bench stones come in a variety of materials, both natural and man-made. Natural stones have variable grit size - the range of grit sizes within a single stone is quite variable. Synthetic stones have a much narrower range of grit sizes within each stone.
Coarse Silicon Carbide - Crystolon
Of the synthetic bench stones, the fastest cutting readily available stones are made from Silicon Carbide (SiC, the same abrasive used in the 15 and 5 micron 3M abrasive sheets discussed throughout these pages). While some people are very happy with their SiC stones, others won't use them. The naysayers report that the stones dish - go out of flat - too quickly. Perhaps a little surprisingly, the naysayers include one of the main manufacturers of both Aluminum Oxide (AlO) and SiC stones - the Norton Company. Norton brands their AlO stones India and their SiC stones Crystolon. From a booklet titled How to Sharpen and What to Use published by the Pike Manufacturing Co.in 1923, which was owned by the Norton Company by the time Pike was producing artificial stones:
|
The peculiarity of Carbide of Silicon crystals is that they cut extremely fast -- but these crystals are very brittle. Hence, while Carbide of Silicon stones are useful for soft steel and for other uses wherein it is desirable to have a rapid breaking down of the crystals, so as to constantly present new cutting points, these stones are not so valuable for regular shop use since they wear down too rapidly to satisfactorily hold their shape.
Aluminum Oxide crystals, on the other hand, from which Pike India is made, are so extremely tough that, while they do not lose in fast-cutting quality, they stand up under even the hardest service. Hence, Pike India stones hold their shape almost indefinitely. There is no steel too hard for them to sharpen quickly, nor hard enough to cause them to groove or wear down unevenly if properly used. |
That was the Pike view of things back in 1923. I wonder if the Norton Company still feels this way? Both the Crystolon and India stones used in these tests are made by Norton.
This ambivalence continues among mail order suppliers of sharpening supplies. One supplier refused to look for SiC stones for me, saying they wore too quickly [Problems with Norton Crystolon stones?]. I finally found these particular stones (3" wide stones rather than the usual 2" wide stones) at Sharpening Supplies in the USofA.
Wear on a synthetic bench stone depends on the abrasive and on the binder used to hold the whole thing together. While all SiC bench stones use Silicon Carbide as the abrasive, I suspect that the modern Norton SiC stones, which they call Crystolon, have a tougher binding matrix ("Amorphous Silica, Fused") than the older Pike stones. I have had no problems with rapid or uneven wear. [Def: Amorphous Silica: A naturally occurring or synthetically produced oxide of silicon characterized by the absence of pronounced crystalline structure.]
Which Grit to Use
When you are grinding it makes sense to use the coarsest grit you can find.In my search for a hand powered alternative to my belt sander I began with coarse sheet abrasives. The coarsest abrasive I found was Norton 3X 60 grit sheet abrasives. However, in tests of this abrasive, I found that it damaged the edge if I ground through the edge (enough to raise a burr on the back). This abrasive also really only works dry and using abrasives dry allows the filings to build up in the work area. Filings in the work area results in a less durable tool (see the pages on Metallography).
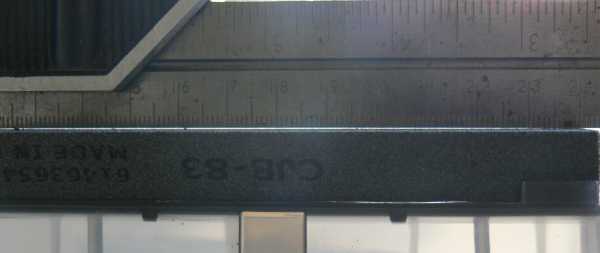
My tests with a Coarse Norton Crystolon (CJB83) bench stone have shown that the more closely packed, slightly finer grit (around 100 grit, it appears) does not chip the edge.
You can see micrographs of these and other abrasives here.
I bought all three grits of Norton Crystolon bench stones, but ended up really only using the coarse stone (CJB83). Since it is safe on the edge and faster than the medium or fine stone, it is the logical choice. Not only that, subsequent testing with the fine SiC stone revealed a very high wear rate. I did not do any actual measuring, but the wear rate of the fine stone could be 100 times that of the coarse stone.
Problems with Norton Crystolon stones?
| Problem | Symptoms | Solution | |
|---|---|---|---|
| Too Hard | Have you bought and tried a coarse Norton Stone? Some recently purchased stones are much harder than the stone I bought. As a result, the grinding action is much slower - the blade just slides across the stone with little or no abrasive action. A few people who had bought coarse SiC stones based on recommendations on these pages had reported problems - they could not get the stones to cut at all. However, another person has recently (Jan '10) reported no problems with the coarse Norton stone! So, first check your stone to see it if is cutting well. A problem stone will not cut at all. The blade will seem to glide over the stone, and no slurry will appear in the oil. If that happens, proceed to the next section. |
A recent post on the oldtools list suggests a solution for this problem - rub the stone of the sidewalk! This is the standard way to flatten an oil stone. A concrete sidewalk or concrete block that is reasonably flat will flatten the stone by wearing off a bit of the surface. In this case you want to remove the hard outer surface, not flatten an already flat stone.
I first tried a sidewalk - concrete with small stones in it. It worked, but it left the silicon carbide stone surface scratched. I don't think that really matters much. The stone is flat but the surface is a bit scratched. However, since you are working the primary back from the edge this is not a problem. The one Norton coarse Silicon Carbide stone I had that just would not work - plane irons seemed to slide across the surface - was fixed by just less than a minutes rubbing on the sidewalk. Two people who had hard stones now have stones that cut quickly, one is still not satisfied with the cutting action. Successful removal of the hard surface may require up to 5 minutes of moderate rubbing on a concrete block. Continue until the blade no longer slides over the SiC stone - you should be able to hear and feel the cutting action. The grinding sound changes from a light slithery sound to a much different deeper sound. The feel changes from the blade sliding on the stone to the blade grabbing on the stone.
| |
| Too soft | One viewer of these pages bought a coarse Norton Crystolon stone model number CJB-6 [6" x 2" x 1"] instead of the CJB83 [8" x 3" x 1/2"] that I use. His stone wore very quickly - unusable for edge tools. Be very careful which stone you buy. It is a surprise to me that Norton Crystolon stones in different sizes would vary so much in hardness. | Try sending it back to the supplier. |
Jig or No Jig
While many people use bench stones without a jig, I recommend using a jig. As well as being more accurate, a jig allows you to grind the primary faster.If you watched the video, you will have seen that I press pretty hard. The blade I ground in the video began with a 30 degree primary bevel. Grinding this down to 25 degrees took several minutes. Without the jig to maintain the angle, I would not have been able to press as hard as I did. The grinding would have taken longer and produced a rounded, rather than flat, bevel. With the jig I was able to concentrate on steady firm pressure.
Accuracy is important to me when I am testing. In this case, I was trying to determine how well the SiC bench stone worked for different types of plane blades -- varying from older high carbon steels to the newer High Speed Steels. The goal of the test was to decide if a SiC bench stone was a reasonable alternative to powered grinders for primary bevels. Testing requires standardization - all the blades had to be ground to the same primary angle, from the same starting condition. Testing requires repeatability -- someone else with the same bench stone and the same blade must be able to perform the test and get the same results (within reasonable error limits).
While my requirements in this test exceed those of the home woodworker, I believe that the speed and accuracy achieved by using jigs will benefit everyone.
Which Jig?
I have found that the performance (grinding speed) of a bench stone greatly improves if you use the entire surface of the stone. The real work is done in the middle of the grinding motion, with much less work done during the speed up and slow down periods. With an 7" range of motion on an 8" bench stone, you can get the maximum grinding action across middle 5 or 6 inches.In a previous test I was using about half the stone - the jig allowed me to use only the front 4" of an 8" stone. With a 4" range of motion, I was probably only getting the maximum grinding force across the middle 1 or 2 inches.
You cannot use the entire length of the bench stone if the jig is riding on the stone. The jig must not ride on the stone and must allow use of the full length of the stone.
I have also found, at least with silicon carbide stones, that pressure makes a huge difference. If you are not pressing hard enough, the blade slides over the stone with very little cutting action. Once you are exerting enough pressure, the sound changes - you can hear the abrasive cutting metal from the surface. Once you reach this pressure level, the stone works very quickly.
The jig then must allow the user to apply considerable force.
The Setup
The setup for this test is shown on the right.
The stone is held in version 4 of my bench stone holder, also known as a Stone Vice. The vice top is surfaced with glass - allowing for much reduced friction between the jig and the vice.
The blade is held in a new slanted jig. The range of motion with a jig that holds the blade at right angles is limited by length of the plane iron. By building a new jig that holds the plane iron at an acute angle, I was able to get the full 8" range of motion.
This jig has an included angle of 50 degrees and is about 5" tall. I selected 50 degrees as twice my standard primary angle of 25 degrees. This means the extension is about equal to the jig height and the range of motion while grinding is 9 inches. If you have shorter blades, you can use a smaller angle and still get a good range of motion. For example, when grinding chisels which are not as long as plane blades, I use an included angle of 35 degrees. This gives me a good range of motion even when the chisel has less than 3" of blade.
 This is grinding, not honing. There is a wide bevel to grind down and it takes quite a bit of pressure and more time than honing.
The pad of my left hand rests on the blade, just above the edge. This hand provides the downward force and some of the backward force as well.
It also controls where the force is applied on the blade. While the main motion is along the length of the blade, there is a gradual side to side motion as well - to get even wear on the stone. As I work the blade toward the left/right side of the stone I put a little more pressure on the left/right side of the blade. This tends to compensate for the fact that most of the work is being done in the middle of the stone (which is always under the blade, while the sides are only sometimes under the blade). I also grind with part of the blade off the side of the stone, to ensure even wear across the full width of the stone.
Notice the buildup of oil and filings (and a little SiC fractured during grinding) in front of the blade.
Wet or Dry?
There is some disagreement about what "lubricant" to use on Silicon Carbide stones, and on oil stones in general. Some people use SiC stones dry, some with water, others with various oils. One book on sharpening, The Razor Edge, go so far as to report tests in which dry bench stones out performed oiled bench stones.First, the oil is not a lubricant since its purpose is not to reduce friction. Rather, it is a liquid in which filings and fractured SiC crystals float off the bench stone surface, allowing them to be swept out of the working area by the blade.
I have found that the same baby oil (light mineral oil) that I use on sheet abrasives works well on SiC bench stones. I apply a little more near the front edge when the stone no longer has a sheen. The grinding action moves the oil and the filings to the far end of the stone, where it can be wiped or blotted off.
The baby oil serves another important function. As you pull the blade toward you, the baby oil is pushed aside by the blade. If the resulting stone surface shows a uniform pattern of baby oil across the width of the blade, you know the blade is correctly registered in the jig. With a dry stone there is no such surface appearance as a guide.
Cleanup involves adding a little more baby oil, rubbing it over the entire surface with my finger, then blotting the oil and filings up with a rag.
I use baby oil on the 3M abrasives and on my bench stones. You can see micrographs of blade sharpened this way. You can see no evidence that using oil is allowing filings to nick the edge in some way.
Short cut
 In a recent test involving a number of very hard blades, I started to add another bevel to reduce the benchstone time.
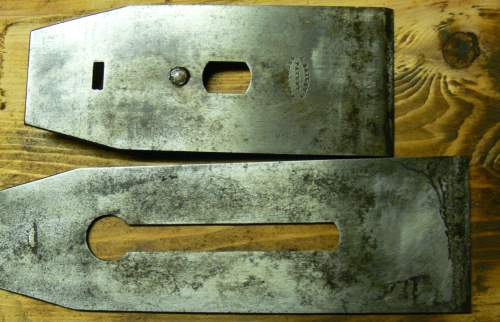
In this picture, you can see three bevels. Two of these I call grind bevels, only one is a hone bevel.
This blade is high speed steel and is almost 0.12" thick. A 20 degree primary bevel is over 0.33" wide. The thicker the blade the wider the bevel. The smaller the angle, the wider the bevel. With a thick blade and a shallow angle the result is a very wide bevel. As the area of the bevel increases, the force per unit area decreases and the total grind time increases. Add to that a very hard HSS blade and grind time for the full primary bevel is quite long. You could do it, but it will take a long time.
The goal is to not grind near the edge with the machine grinders. So, I used a 48 grit Aluminum Zirconia belt on my belt sander at 20 degrees. I stopped well short of the edge.
Then I tried to hone a 24 degree first honed bevel on 15 micron 3M paper. This first honed bevel got pretty wide and I was faced with regrinding the primary. Rather than go back to the belt sander, I use the coarse silicon carbide bench stone to grind a 22 degree primary. You can see from the picture that this bevel is only 40% of the width of the full primary - 0.14" instead of 0.33". It is also more regular - you can see that the primary made with the belt sander is a little deeper on the right side of the image than the left.
Using the SiC bench stone in the stone vice with my jig, I removed all but the last 0.003" of the honed bevel. Accuracy like this is no problem. Grind for 20 seconds - check the remaining honed bevel. Repeat as necessary.
The blade is now ready for the usual honing sequence - 15, 5, 0.5 micron 3M abrasives.
Yes, this is not the usual set of angles for a plane iron. I am testing to see how reducing the final honed angle from 31 degrees to 26 degrees affects blade durability with this HSS iron.
Bench Stone Testing
The series of tests had two goals:
- Determine whether bench stones can be used to grind primary bevels on the full range of plane irons - classics made of High Carbon steel through more recent blades made from High Speed Steel.
- Determine how durable the bench stone is when used for grinding.
Test Design
To measure the grinding rate for a particular bench stone and a particular blade requires a standardized test, such as:
-
Prepare the primary bevel at about 25 degrees.
I set each blade to the same extension in the grinding jig, then grind the full primary bevel using the test bench stone. I angle the blade to the direction of motion slightly so I can see the angled scratches cross the entire bevel.
I get a 600 dpi scan of the bevel, with the blade in the grinding jig so the bevel is lying flat on the scanner screen.
-
Small microbevel.
Using 15 micron abrasive I hone a small microbevel at 29 degrees.
I get a 600 dpi scan of the bevel, with the blade in the grinding jig, measuring the width of the microbevel.
-
Grind most of the microbevel away.
Using the same extension in the grinding jig, I grind away most be not all of the microbevel, keeping track of how long it took. I want some of the microbevel left, so I can determine how much metal I ground away.
Bench Stone results
This test series uses 5 different blades on a series of different bench stones. By using several blades and several bench stones I am able to compare blade toughness as well as bench stone speed.The results of this test series differ quite a bit from the first test series, even though I am using the same plane blades and the same SiC bench stone.
- In the first test I ground the blades to a common primary angle, but had not standardized the primary bevel before the test.
- The new slanted jig allows me to use the full length of the bench stone instead on only half. I think this actually triples the grinding speed.
- I now know to use more pressure while grinding, working to get the harsher sound of effective grinding.
The images have been resized down to 300 pixels. You can look at the full sized image by double clicking the thumbnail. Single click to revert to the thumbnail image.
| Blade/steel | Blade width | Primary width before/after | Time | Relative toughness | Image |
| Ohio - High carbon. | 2" | 0.243/0.256 | 210 seconds | 21.7 |

|
| Stanley - V logo unlaminated. | 1.75" | 0.18/0.196 | 75 seconds | 5.8 |

|
| Stanley - V logo laminated. | 1.75" | 0.187/0.202 | 50 seconds | 5.5 |

|
| Hock - A2. | 1.75" | 0.220/0.23 | 90 seconds | 11.5 |

|
| CPM 3V | 2" | 0.292/0.310 | 90 seconds | 4.7 |
|
Subsequent Testing
Starting in December 2006, I conducted an extended test using 13 plane irons of various steels to determine if steel type had any impact on initial sharpness. The blades tested included:- High carbon steel - Stanley and Sargent blades from pre-1920 era.
- High carbon steel - modern laminated blade from Tsunesaburo
- Alloy steel - Clifton Hand Forged
- A2 Steel - Lee Valley, Lie Nielsen
- D2 Steel - Gramercy
- CPM 3V - Steve Elliott
- S53 - Holtey
- HSS - Mujingfang, Academy Saw Works
All blades had primaries ground using the Norton SiC bench stone before this test began, but had honed microbevels and wear bevels from use. The test was renewing the primary bevel on blades that already had good primary bevels.
I put new primary bevels on all these blades with little difficulty, continuing until a burr had formed on each blade. No blade took more than 2 minutes. The stone showed little wear.
I then sharpened all 13 blades in the usual way - 3 microbevels on front and back using the 3M abrasives and my jig. Then using a digital kitchen scale and some rayon thread, I did an initial sharpness test on these blades. There was no difference in initial sharpness.
Discussion
This test series allows me to compare the "toughness" of the blades, as well as the grinding speed of the bench stones. The toughness measure is the time taken in seconds divided by the volume of metal removed. Wider thicker blades have a greater primary bevel surface area. This means that you have to push harder to get the same force per unit area of the bevel, and hence the same rate of metal removal. If you listen for the sound of metal being removed, you may well compensate for the size effect and take about the same length of time for all blades.Primary Bevel Quality
The resulting primary bevels are very regular - much more regular than anything I get when using the belt sander. Of course, the primary bevel never makes contact with the wood, so there is no direct benefit to the finished product. However, if working the primary (and the microbevels) entirely by hand means that the steel at the edge is stronger (has not had its temper drawn by heat during powered grinding), then there is a benefit to the woodworker in longer edge life (longer in a sharp condition) and fewer sharpenings. It is up to each woodworker to decide if this is an effort worth making.Steel Toughness
Grinding time depends on bevel surface area and steel toughness. A wider, thicker blade will take longer to grind than a narrower, thinner blade because there is more metal to remove. The tougher the steel the longer it takes to sharpen and the longer it lasts when planing. I am assuming that the relationship between grinding time (Tg), bevel area (Ab) and steel toughness (St) is something like
| Tg = Ab * St * C |
| where C is some constant. This leads directly to |
| St = Tg / (Ab * C) |
| so steel toughness can be deduced from grinding time divided by area. |
Bench Stone Grinding Speed
The time to grind the primary in this series of tests, using the same SiC bench stone and the same blades, is much shorter than the times in the previous series. For example, I restored the CPM-3V blade in 90 seconds this time, as opposed to 40 minutes last time.I think I learned a lot about how much pressure you can use with a SiC stone - I now use much more pressure than on the first tests. The difference in the sound of the scrapping between the stone and the blade is very noticeable. The speeds are now reasonable for regular shop use of these stones for renewing a primary bevel - that is, once the microbevels are too wide, you can quickly renew the primary - probably in less than 2 minutes - using a SiC stone.
The relative toughness should not be relied upon. I did the Hock A2 blade first and was probably not pressing as hard. I did the CPM-3V blade last, and was using lots of pressure and getting very good results.
I should repeat the entire set again to see if the results stabilize - are more reflective of the blade width and thickness.
Further Testing
This series of tests has two goals: how good are the various types of stones, how good are the resulting edges.The best stone cuts quickest while retaining its shape. Comparing grinding times between SiC and AlO stones should be fairly repeatable. Comparing stone flatness should also be straightforward.
Lets see what the tests show.
I will, after dulling the blades, redo the primary to see how long it takes from a standard dull condition to a renewed primary. The above times are not true comparisons, since the blades did not all have exactly the same pre-test primary bevel.
Bench stone Wear
Most of the primary bevel grinding so far has been done with the Norton SiC coarse stone. I did grind one primary bevel with a water stone - a Dragon stone.
Water Stone Wear
 I have done limited testing with water stones as well. The stone I tested, a 700 grit Dragon Stone from Japanese Woodworker, is "fused from particles of Green Carbide abrasive" - presumably Silicon Carbide.
There is good news and bad news. First the good news - the stone is very fast. Again, no standardized test, but given the starting bevel on an older, O1 high carbon steel type blade, it seemed to go much faster than the Norton SiC coarse stone.
Now the bad news. You can see the wear on the stone in this picture. This wear is the result of grinding one primary bevel. The wear amounts to about 0.03", on a stone that started out about 1.33" thick (not quite the 1.375" they advertise).
This amount of wear poses two problems. First, you would certainly want to flatten this stone after one or two sharpening sessions. If you flipped the stone over in the stone vice, you could do a second blade on the other wide face. You would then have to flatten both faces of the stone. So, time saved in sharpening is lost to time flattening the stone.
Second, the water stone wear affects the geometry of the sharpened blade, increasing the angle at the edge slightly (by about .3 degrees). This is not a problem for a primary bevel, and perhaps not even a problem for a microbevel.
Oil Stone Wear
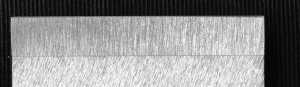
 This is the coarse Silicon Carbide stone after grinding primary bevels on 8 irons.
The total time spent grinding on this oil stone is probably more than 16 times the time spent on the water stone, given the extended grinding sessions for some of the irons.
This stone now varies in thickness between 0.488 and 0.493 inches. While grinding on this stone, I was careful to minimize uneven wear - working the blade from side to side on stone, occasionally switching the stone end for end in the stone vice.
I don't know the original thickness of the coarse SiC stone. An unused medium grit SiC stone's thickness varies between 0.510 and 0.513 inches. I don't believe that the coarse stone started out as thick as the medium stone. If so, the ends of the coarse stone would be closer to 0.510" since it is very hard to grind right up to the end of the stone. The ends on the worn stone are nowhere thicker than 0.493 inches.
I believe that the coarse SiC stone has in fact worn around 0.005 inches after grinding primaries on 8 plane blades. And the wear is quite uniform! There is still no need to flatten this stone.
|
Update Mar 2007
After grinding 40 irons, including all types of tool steels, the middle of the stone is slightly dished. The thickness at the ends averages 0.489", in the middle 0.478". This is a loss of about 0.01" after grinding 40 blades. |
Grinding Demonstration
 You can watch a video of the grinding of a blade that is at least 122 years old, perhaps 132. I recently bought a Stanley #30 - a transitional plane - manufactured between 1874 and 1884. One of the parts suggests it was early in that period.
The blade and cap iron had lots of superficial rust. I oiled the blade and cap iron before taking this picture. The short primary bevel is obvious in this picture.
The plane was neglected for many years (dusty, surface rust on the metal parts) then abused (latex paint on the sole), but otherwise in good shape. The screws that hold the metal frame show no signs of corrosion and the sole is fairly flat with wear near in the mouth in the middle of the blade. I think this plane with fettle well.
 Using mineral oil and 180 grit wet/dry abrasive wound around part of an old axe handle (the oval cross section which allows me to vary the surface area of the abrasive, using a sharper curve to remove deeper rust) it took about 20 minutes to remove most of the rust.
I thought the corrosion on the back of the blade at the edge was not serious. It turns out it was.
The blade had a 30 degree primary bevel. I decided to grind a new primary bevel at 25 degrees using a bench stone. I made a video of the grinding session which is also a demonstration of the stone vice. Unfortunately, the camera was aimed lower than I thought so you cannot see blade and bevel in parts of the explanation. Since you can only regrind the primary bevel once, it will have to do.
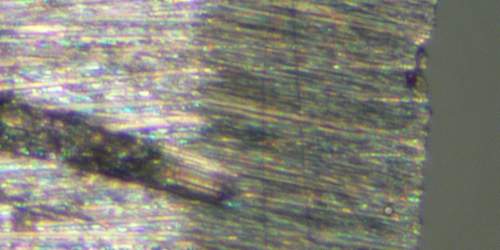
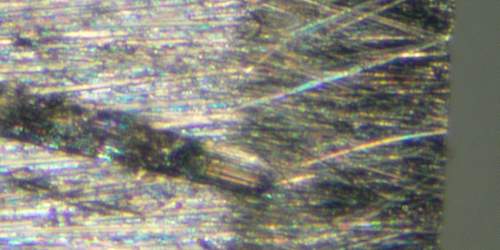
 After the grinding shown in the video, I honed the blade as usual. During honing it was clear that the back bevels were not reaching the edge, but I went through the grits then took this picture (150X) of the blade front at the edge after the 0.5 micron microbevel.
The edge is a disaster.
 This is the back of the blade (150X).
The left half is the 15 micron microbevel, the right half the 5 micron microbevel and probably the 0.5 micron microbevel.
The 15 micron microbevel came no where near the edge. The 5 micron came a little closer, but probably did not reach the edge and certainly did not remove the pitting.
I don't think this problem is a result of pitting alone. I think an earlier owner rounded the back of the blade at the edge while honing the blade. In order to restore the back of this blade I will have to do some serious grinding.
 This is the back (150X) after grinding!
I had the coarse bench stone in the stone vice and the blade in the honing jig, so I used the two - working just the back bevel. I am not sure how long it would have taken to work through the pits on 15 micron (I suspect closer to an hour than 5 minutes), but on the coarse stone it took just a few minutes - less time than it took to do the front.
 And the front (150X) after a bit of a hone on the 15 micron.
There was a very thick wire edge facing the front of the blade after grinding the back. I removed a bit of it before taking this picture. The shiny part at the right is all wire edge that is being removed. It is high enough that the abrasive is just touching it, not the rest of the 15 micron microbevel.
 And the front (150X) after the 15 micron. As usual, I scratched a reference mark near the middle of the blade.
There is still a problem at the edge, but I think this is an indication of a wire edge.
 And the front (150X) after the 5 micron.
The 5 micron abrasive has removed the wire edge and enough metal to almost completely remove the problem at the edge.
 The front (150X) after the 0.5 micron.
There is still a very small defect on the edge. The scratch pattern is a bit unusual -- the last abrasive was 0.5 micron. I think the problem was using the same rag to wipe off the blade as I used to clean the bench stone.
One more complete honing sequence should fix the edge.
It is interesting that a few minutes grinding a back microbevel on a coarse stone can remove fairly deep pitting.
Having ground a wide bevel on the back at the first microbevel angle will affect future honing results. Even the 15 micron abrasive does not cut quickly if required to work a wide bevel and the first back bevel on this blade is no longer a microbevel. Fortunately the 5 micron abrasive cuts quickly and it will be honing the second back bevel which is quite narrow.
Future honing might have been closer to the usual pattern if I had increased the blade extension (reduced the first back bevel angle) prior to grinding off the pits. I can still do this if future honing sessions do not produce the usual results.
What am I doing wrong?
What can go wrong?The key to grinding and honing is to not let a problem go too far before correcting it. If you grind up to the old edge, leaving just of bit of old wear/hone bevel to be removed during honing, then you have done exactly the right amount of grinding. See images during grinding for pictures of the bevel as I grind up to the old edge. To get that good a result I had to check regularly during grinding - look at the bevel and see how close the new primary is to the edge. If it is getting closer on one side than the other, I immediately change my hand position to correct the problem.
Monitoring your progress is essential. To help you see what you have done and what you still need to do use a magic marker to cover the entire bevel, right up to the edge. As you grind you will remove the magic marker away from the edge. Only the unground part near the edge is still black. I have no trouble seeing progress without blacking the entire surface.
-
Is the current edge square to the side?
Check the edge for square to the side before you start. If it is not square, or has chips you must grind out, use the repairing an edge steps below.
-
Do the tool edge and the jig front edge lie in the same plane?
With the blade in the jig at the correct extension, just set the jig in grinding position on a flat surface. Is the entire front edge of the jig in contact with the surface? Is the entire bevel of the iron in contact with the surface? If so, go on to step 3. The first time you draw the blade along the abrasive through the baby oil you should see a full width "wake" in the baby oil. If you always look for that wake, you can skip this step.
If the two edge are way out of alignment you must fix this before you begin. Is the jig square? Find and fix the problem before beginning.
If the errors are small you can still probably grind the iron and get the desired result. The jig positions the iron but is not the main control. Force you apply to the jig and the iron during grinding can compensate for a slight problem in initial setup (or produce a bad outcome even from a good setup). If the setup is only slightly out of alignment, try compensation like:
If for example the left corner of the iron (viewed from a position behind the jig) is off the surface, then the setup will tend to grind more off the right corner of the blade. When grinding you will have to press a little more toward the left corner of the blade to make up for this. As you grind, keep looking at the bevel to make sure the new primary is moving evenly toward the edge. If the primary is getting closer on the right side of the blade (when looking at the bevel), you have to move your pressure on the blade near the edge closer to the right side (view from the back) of the blade. -
Begin grinding with medium pressure on the blade near the edge. If you press too hard, or too far back from the edge, you can deform the blade and possibly the jig, changing the geometry and thus the grinding angle.
Stop and look at the bevel. Has the magic marker been ground away evenly across the blade? Is the width of the magic marker between the edge and the new ground bevel the same across the blade? Is so, continue, but check regularly for even progress. Check more often as you approach the edge.
If the width of the magic marker is not even, begin immediately to compensate by shifting your hand position on the blade near the edge. A very small movement of you hand toward the side that is not getting removed as quickly (the magic marker is wider) can make a big difference.
Repairing an Edge
You have a blade with a chipped edge, or an edge which is not square to the side. You cannot repair the blade without grinding at the edge. What to do?When using a belt sander, I first correct the edge, then grind the primary bevel. Use the same approach here:
-
mark the new edge on the back of the blade,
-
using the edge of your coarse stone rather than the face, with the blade perpendicular to the stone, move back along the length grinding the edge down to the line,
- you are now ready to grind the primary.
The resulting grinding operation is unlike the standard in that you have no existing wear/hone bevel to use as a guide to grinding. You can try to grind without this guide. If so, you have to watch this flattened end of the iron as well as the bevel to assess progress. You have to grind until the flattened end is gone.
A better alternative is to alternate grinding with honing on 15 micron abrasive. This is a little tedious, changing back and forth between grinding and honing jigs, but will get you a better edge.
-
Hone a narrow first micro bevel using 15 micron abrasive. Use your regular honing jig at the regular first microbevel angle. Begin with pull motions or you might tear the abrasive. You have to be careful to check the flattened end here while honing - make sure it is narrowing evenly.
If the 15 micron abrasive is not honing at the edge (the existing primary angle is too large) you will have to begin by grinding.
If this honing step removes all of the flattened edge, you can continue honing in the usual way.
- Grind, using this new first microbevel as a guide. Continue until you have almost removed all of the first microbevel. Repeat from step 1.
Other bench stone tests.
Lee Valley water stone testing is a good method of comparing stones.Similar to my treatment, which used only oil stones, Lee Valley used only water stones. They test in a grinding situation. They first scratch a bevel using a 220 grit stone, then remove those scratches using 1000 grit stones.
They show micrographs of the bevel near the edge for each stone.
Interesting, one thing they omit is how long the 220 grit stone used to scratch the bevel would take in a similar test. That is, how long it would take to remove the diagonal scratches left by the setup.
When I grind to the primary bevel I stop before the primary reaches the edge. I usually stop about 0.01" short of the edge. I then use fine abrasives on the edge itself.
This means that the metal near the edge - the only metal that actually makes contact with the wood and wears during use - is never compromised by the large grits in the low numbered stones. Damage done by large grit particles - in fact any grit particle larger than 5 microns - continues far beneath the bottoms of the scratches left by the grit. The damage is usually 2 or 3 times that deep.
This study does provide useful comparison between stones around 100 grit. The article also lists average grit size for the various stones - which put them into the 15 micron range. If used for the first honed microbevel following my methodology, where you increase the angle from 25 to about 29 degrees and hone a very narrow microbevel right at the edge, any of this stones could be used for the first microbevel. When used for this purpose, rather than for grinding the primary, they would almost never need flattening.
Jigs
Check out my jig page for a simple jig you can make in your shop, along with a sharpening set up using sheet abrasives, that reliably produces excellent edges, for all types of irons.